How to Build an Email to LinkedIn Profile Enrichment API with Clay and Replit
Introduction #
This guide will walk you through how to set up an API that enriches work email addresses with corresponding LinkedIn profile data using data providers hosted on Clay.
In the end, you will have an endpoint: /clay/email-to-linkedin-start that can take in email addresses and return matching LinkedIn profile data within the same API call.
The API uses Replit's built-in key-value database to manage requests and responses asynchronously. You will need an active Clay account to build this tool.
Getting Started #
Set up your Clay Table
Once you have signed up for Clay, fork this Clay table into your workspace. The table takes in email addresses via webhook, runs the LinkedIn enrichment, and sends requests to one of two HTTP API endpoints.
Check your leftmost column, where your data source is located. If you click on that leftmost column of the table and do not see a Sources > Pull in data from Webhook option (see image below), follow the next steps.
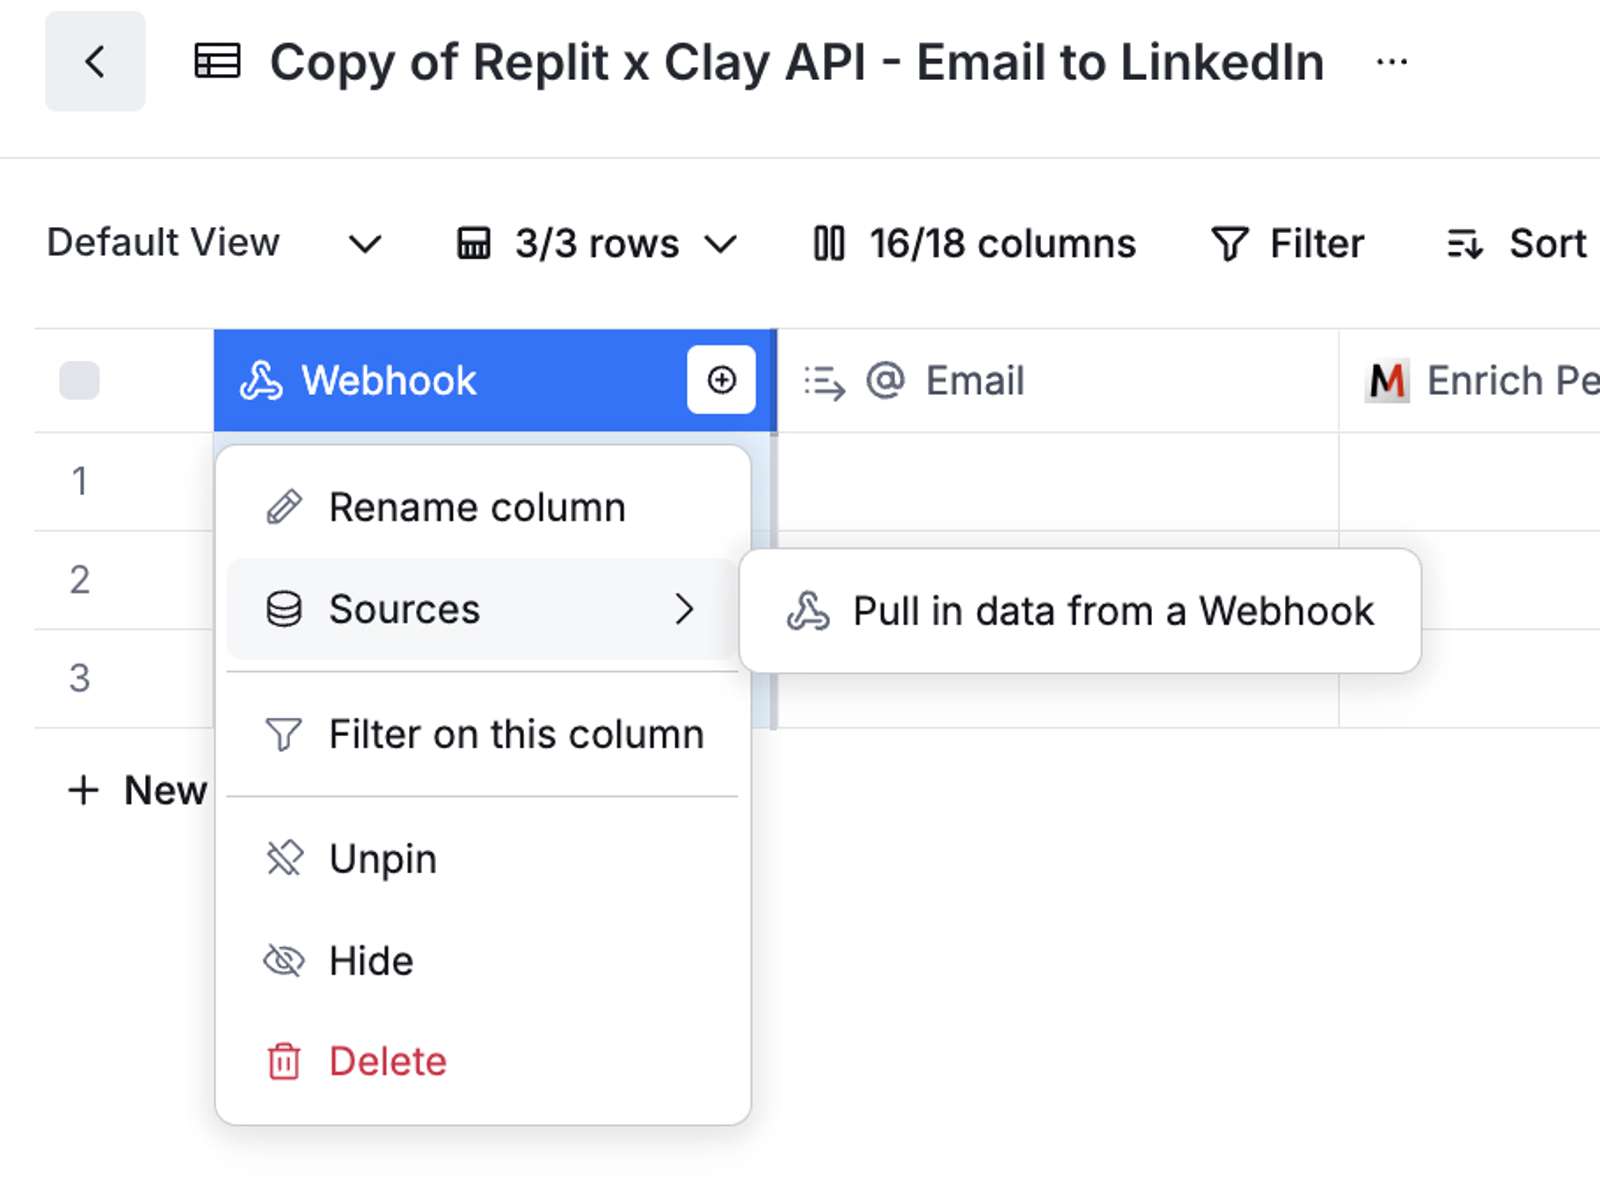
Your table should have a webhook column with those options. If not, read the next steps on how to configure it.
Setting up Clay Webhook import
If you do not see the option above, and instead see something like this image in your leftmost column, head to the Import button on the bottom of the table.
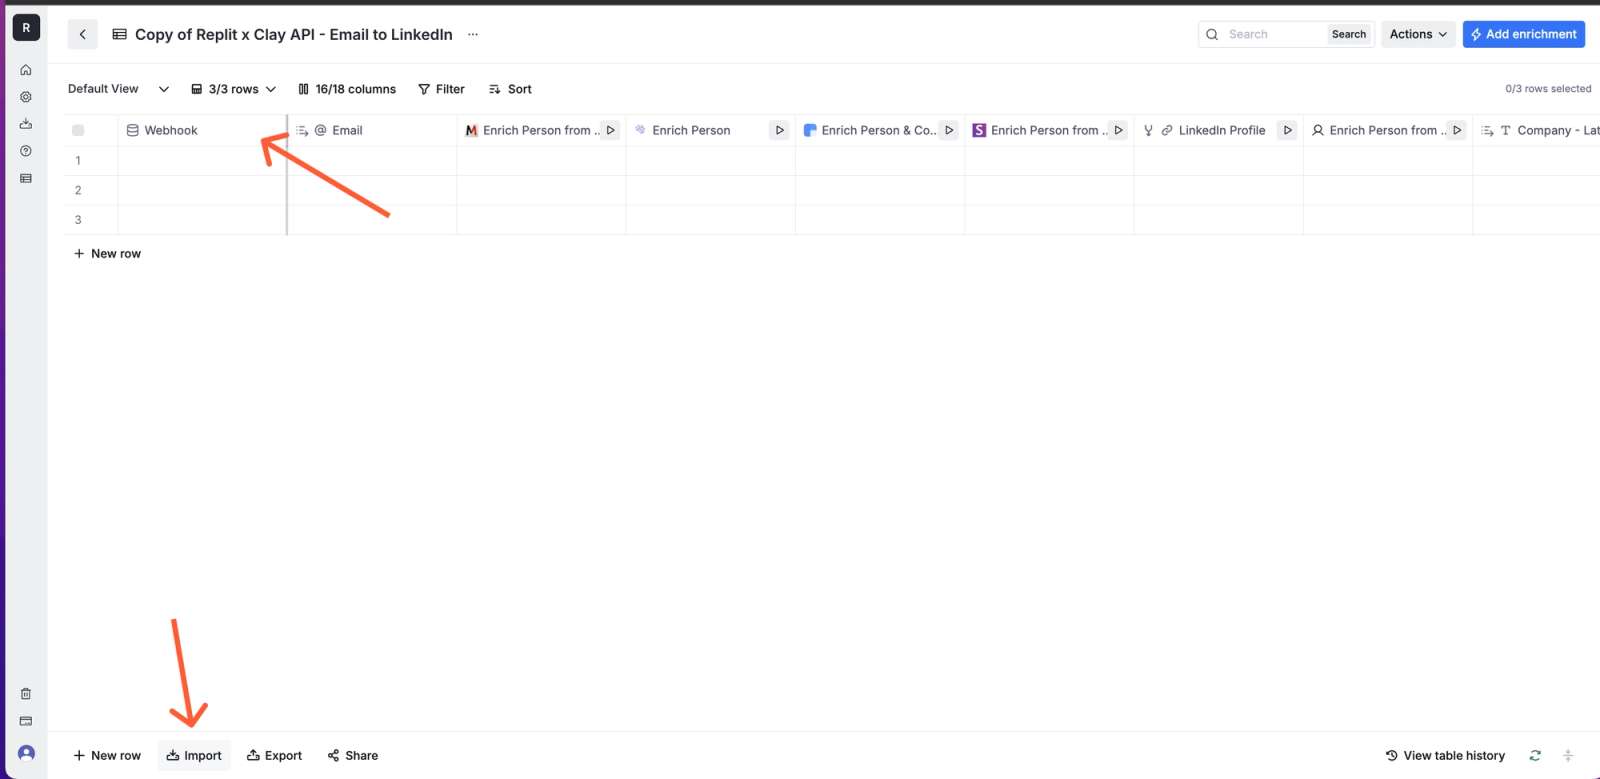
Select the Import Data from Webhook option.
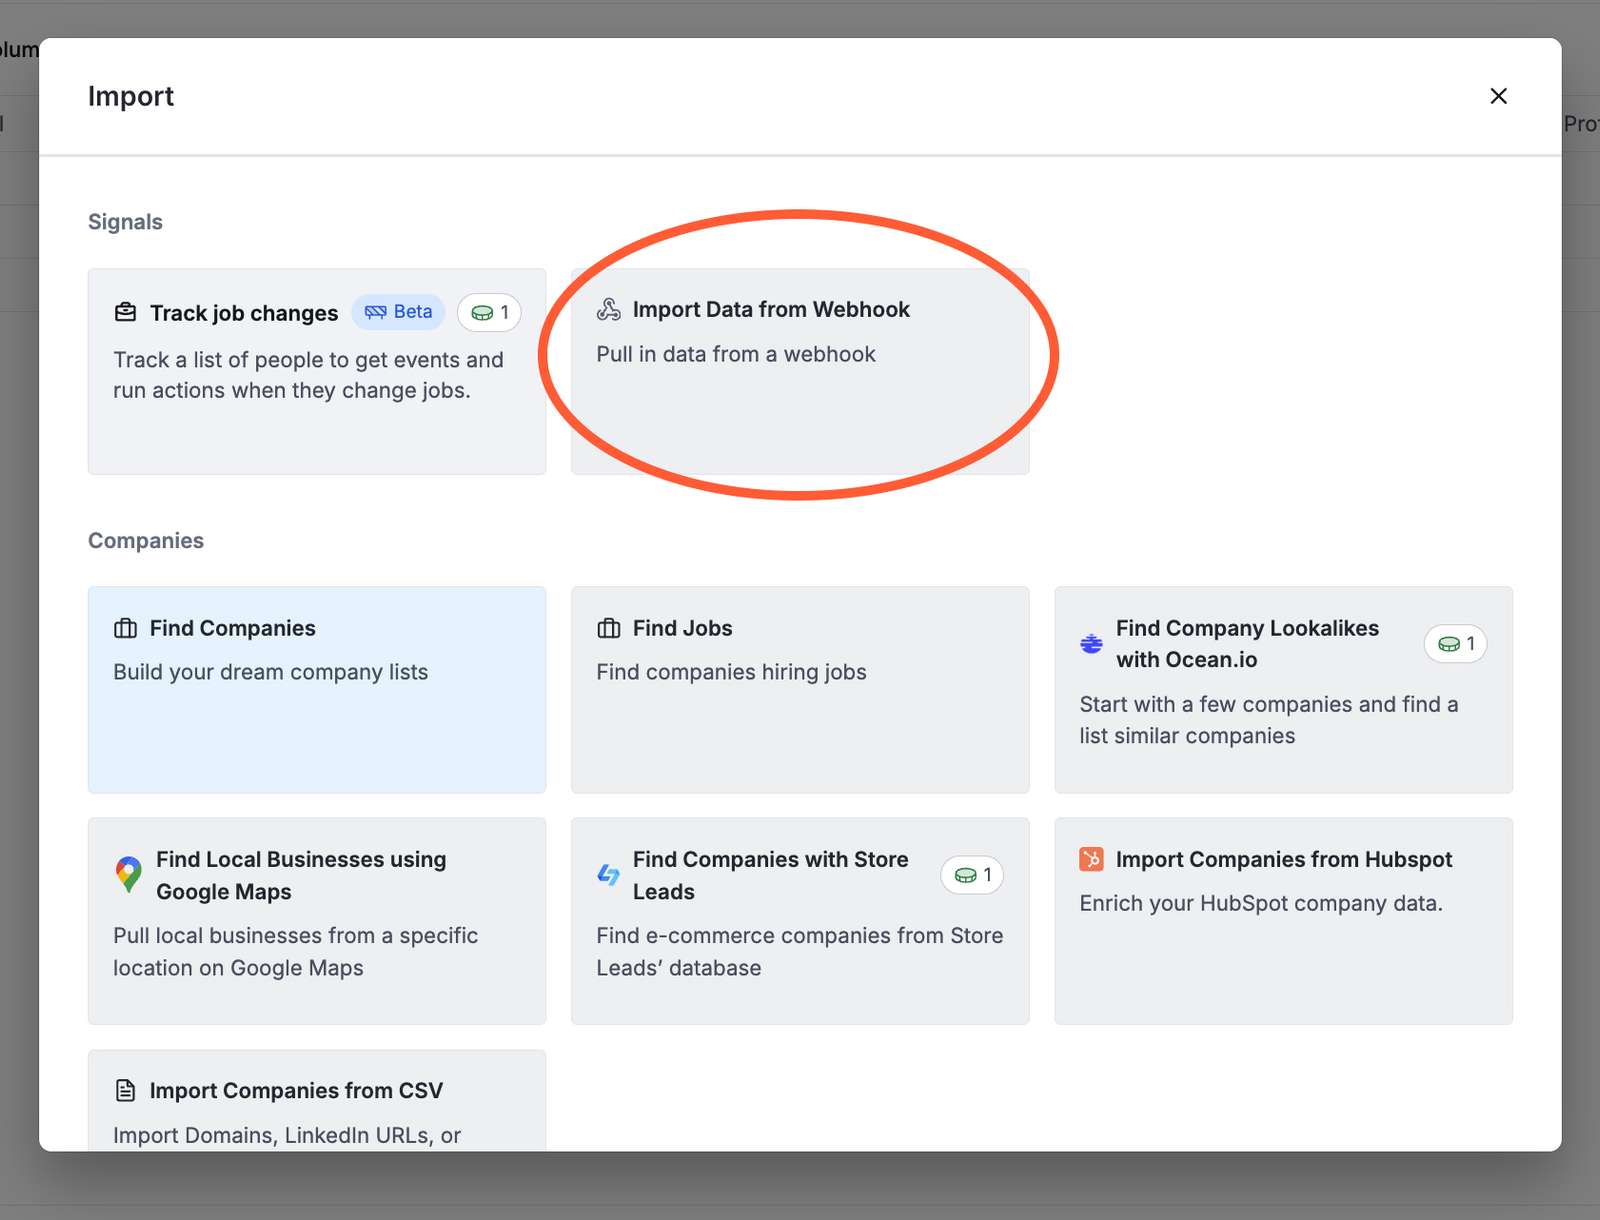
This should give you your Clay Webhook URL.
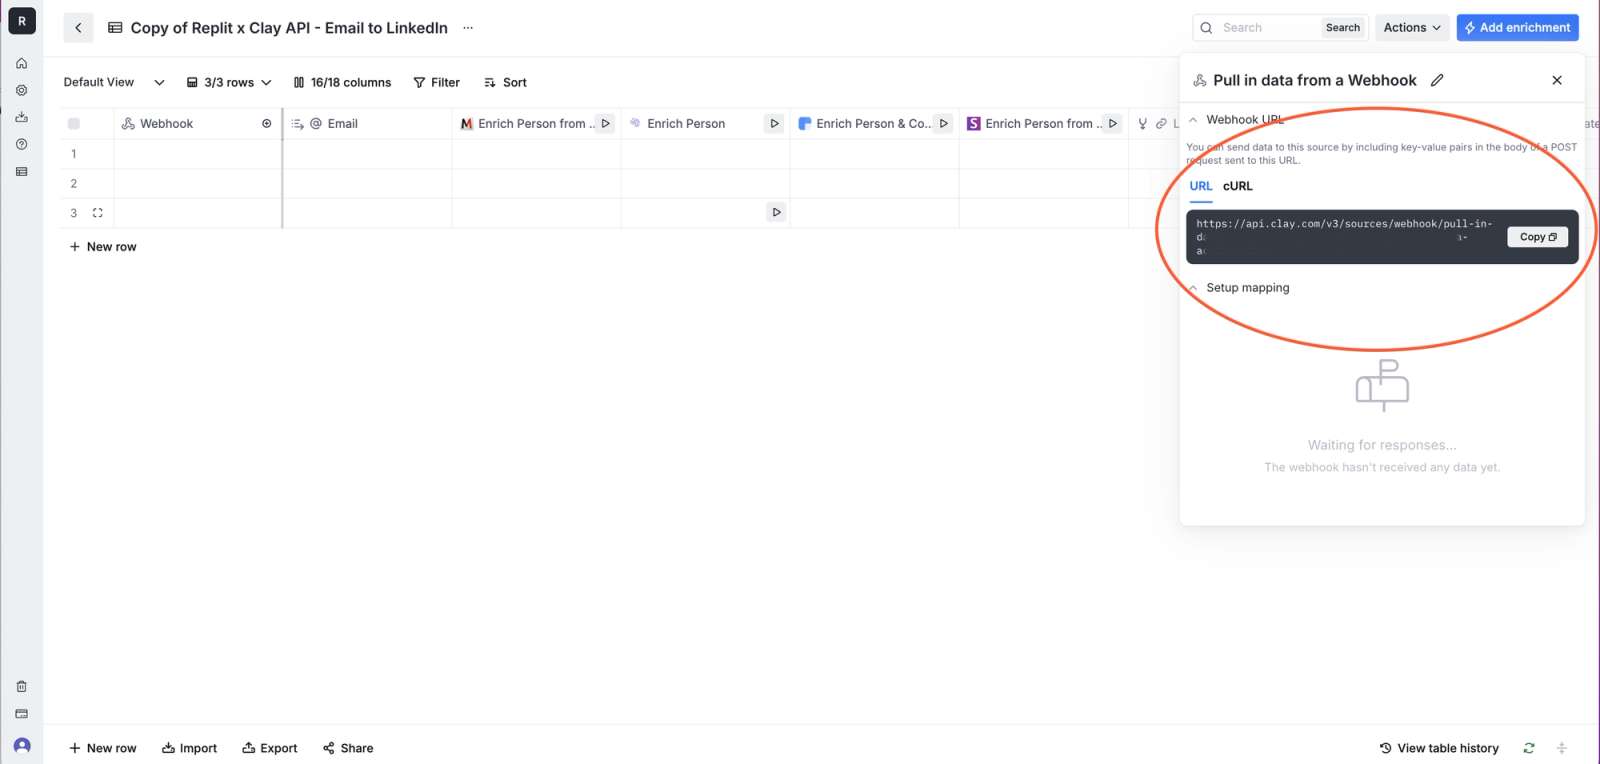
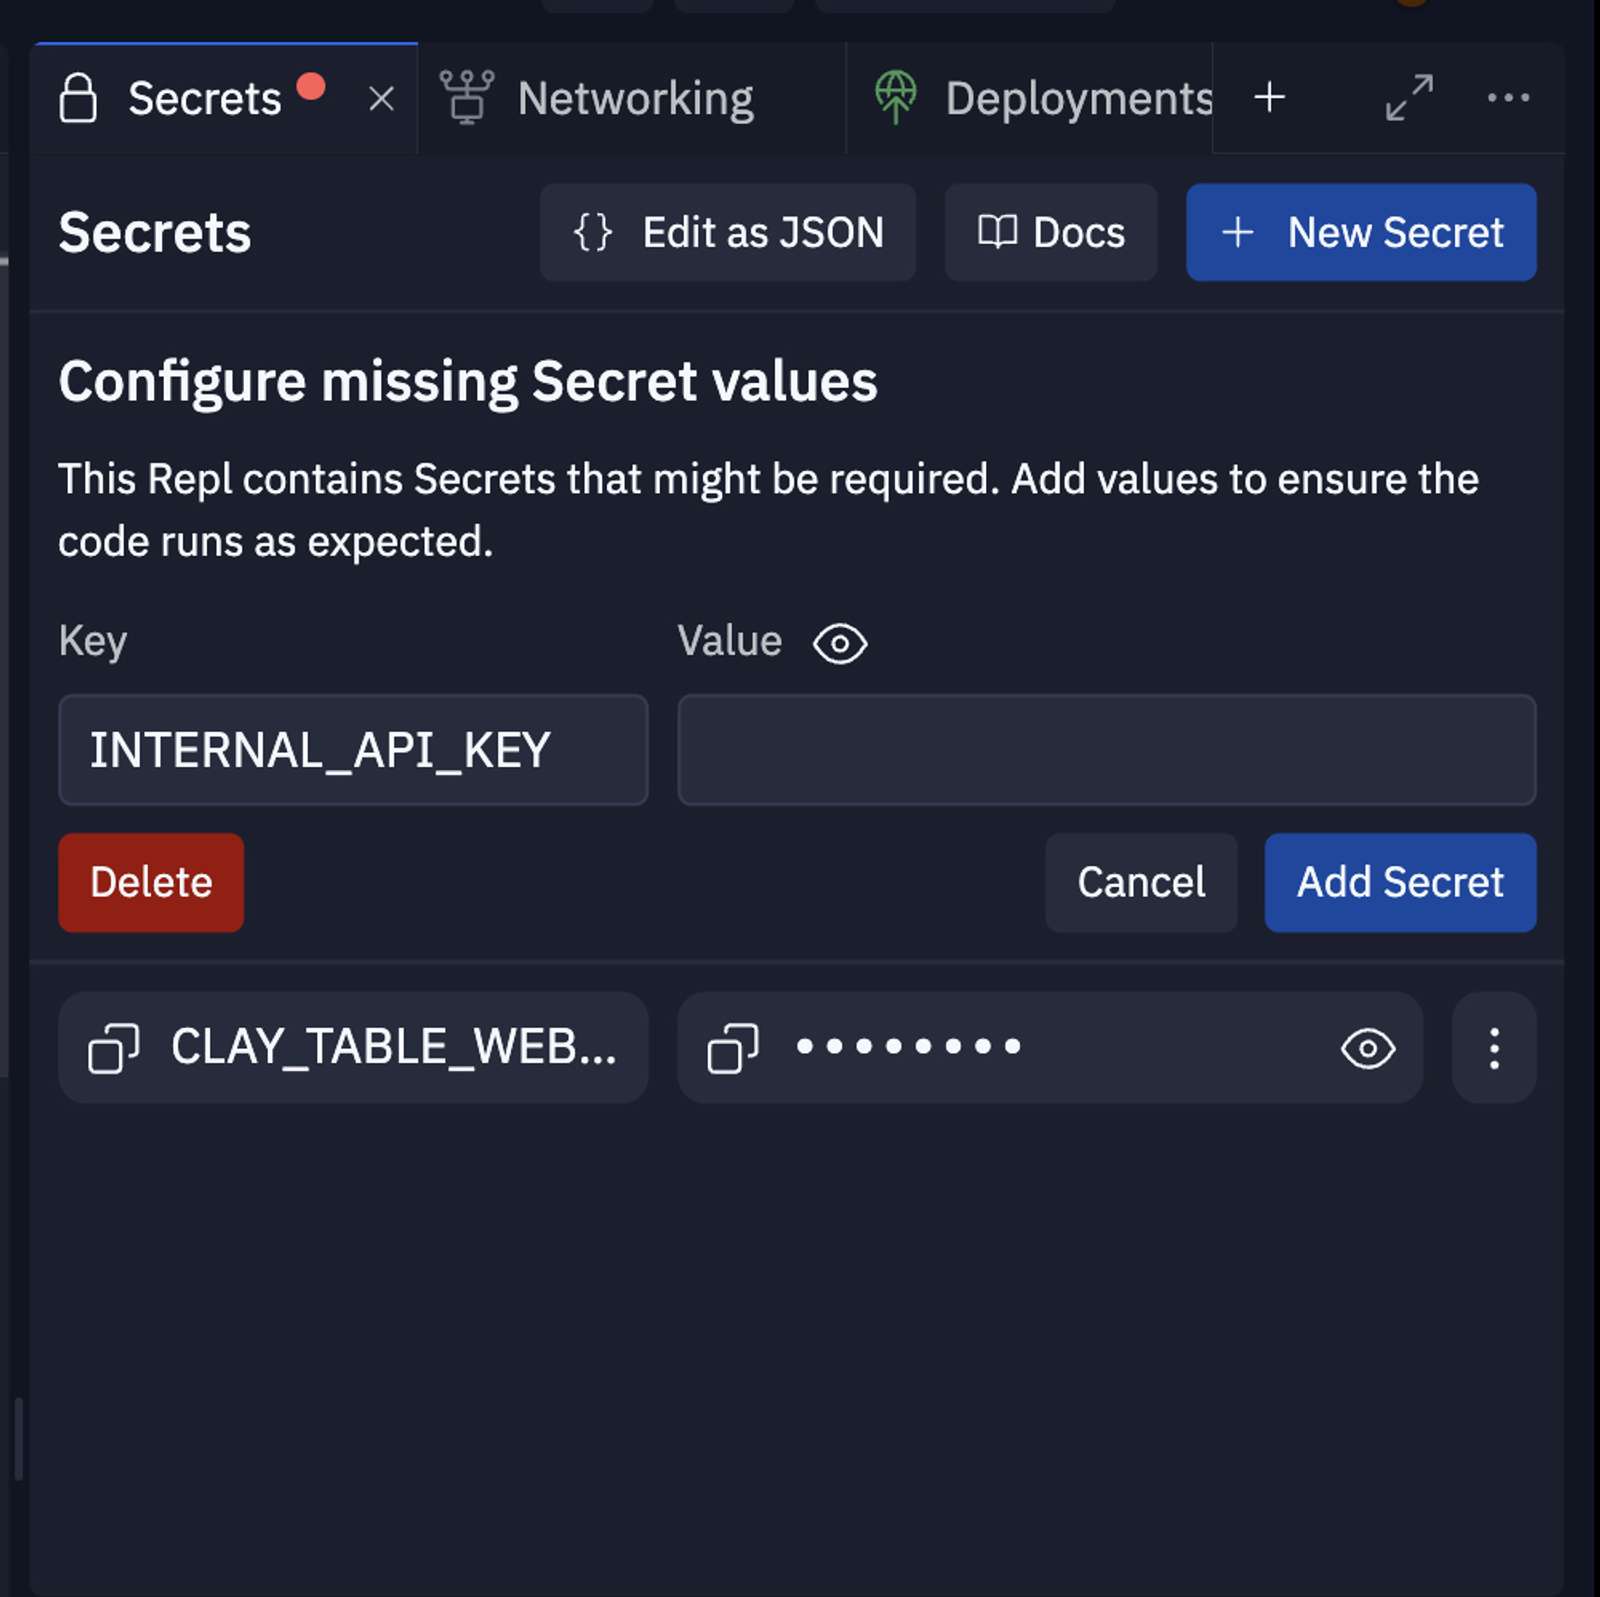
Copy this URL and Paste into Replit Secrets as the value to CLAY_TABLE_WEBHOOK_URL.
Set Up Your Replit Project
Head over to your Repl. There is one more Secret you can add INTERNAL_API_KEY. This should be a secure random string (i.e. a “password”) that will authorize who can use your API once it’s completed.
Users of your API will need to pass the string value in the Authorization value in the headers of requests so that requests can pass the require_api_key function. This prevents unauthorized users from pinging your API and using up your Clay credits.
Set your Development Replit Webhooks in Clay
Before we start testing requests on our running Repl, we need to tell Clay where to send completion requests once the enrichment flow is complete.
Head back to your Clay table and head to the rightmost columns.
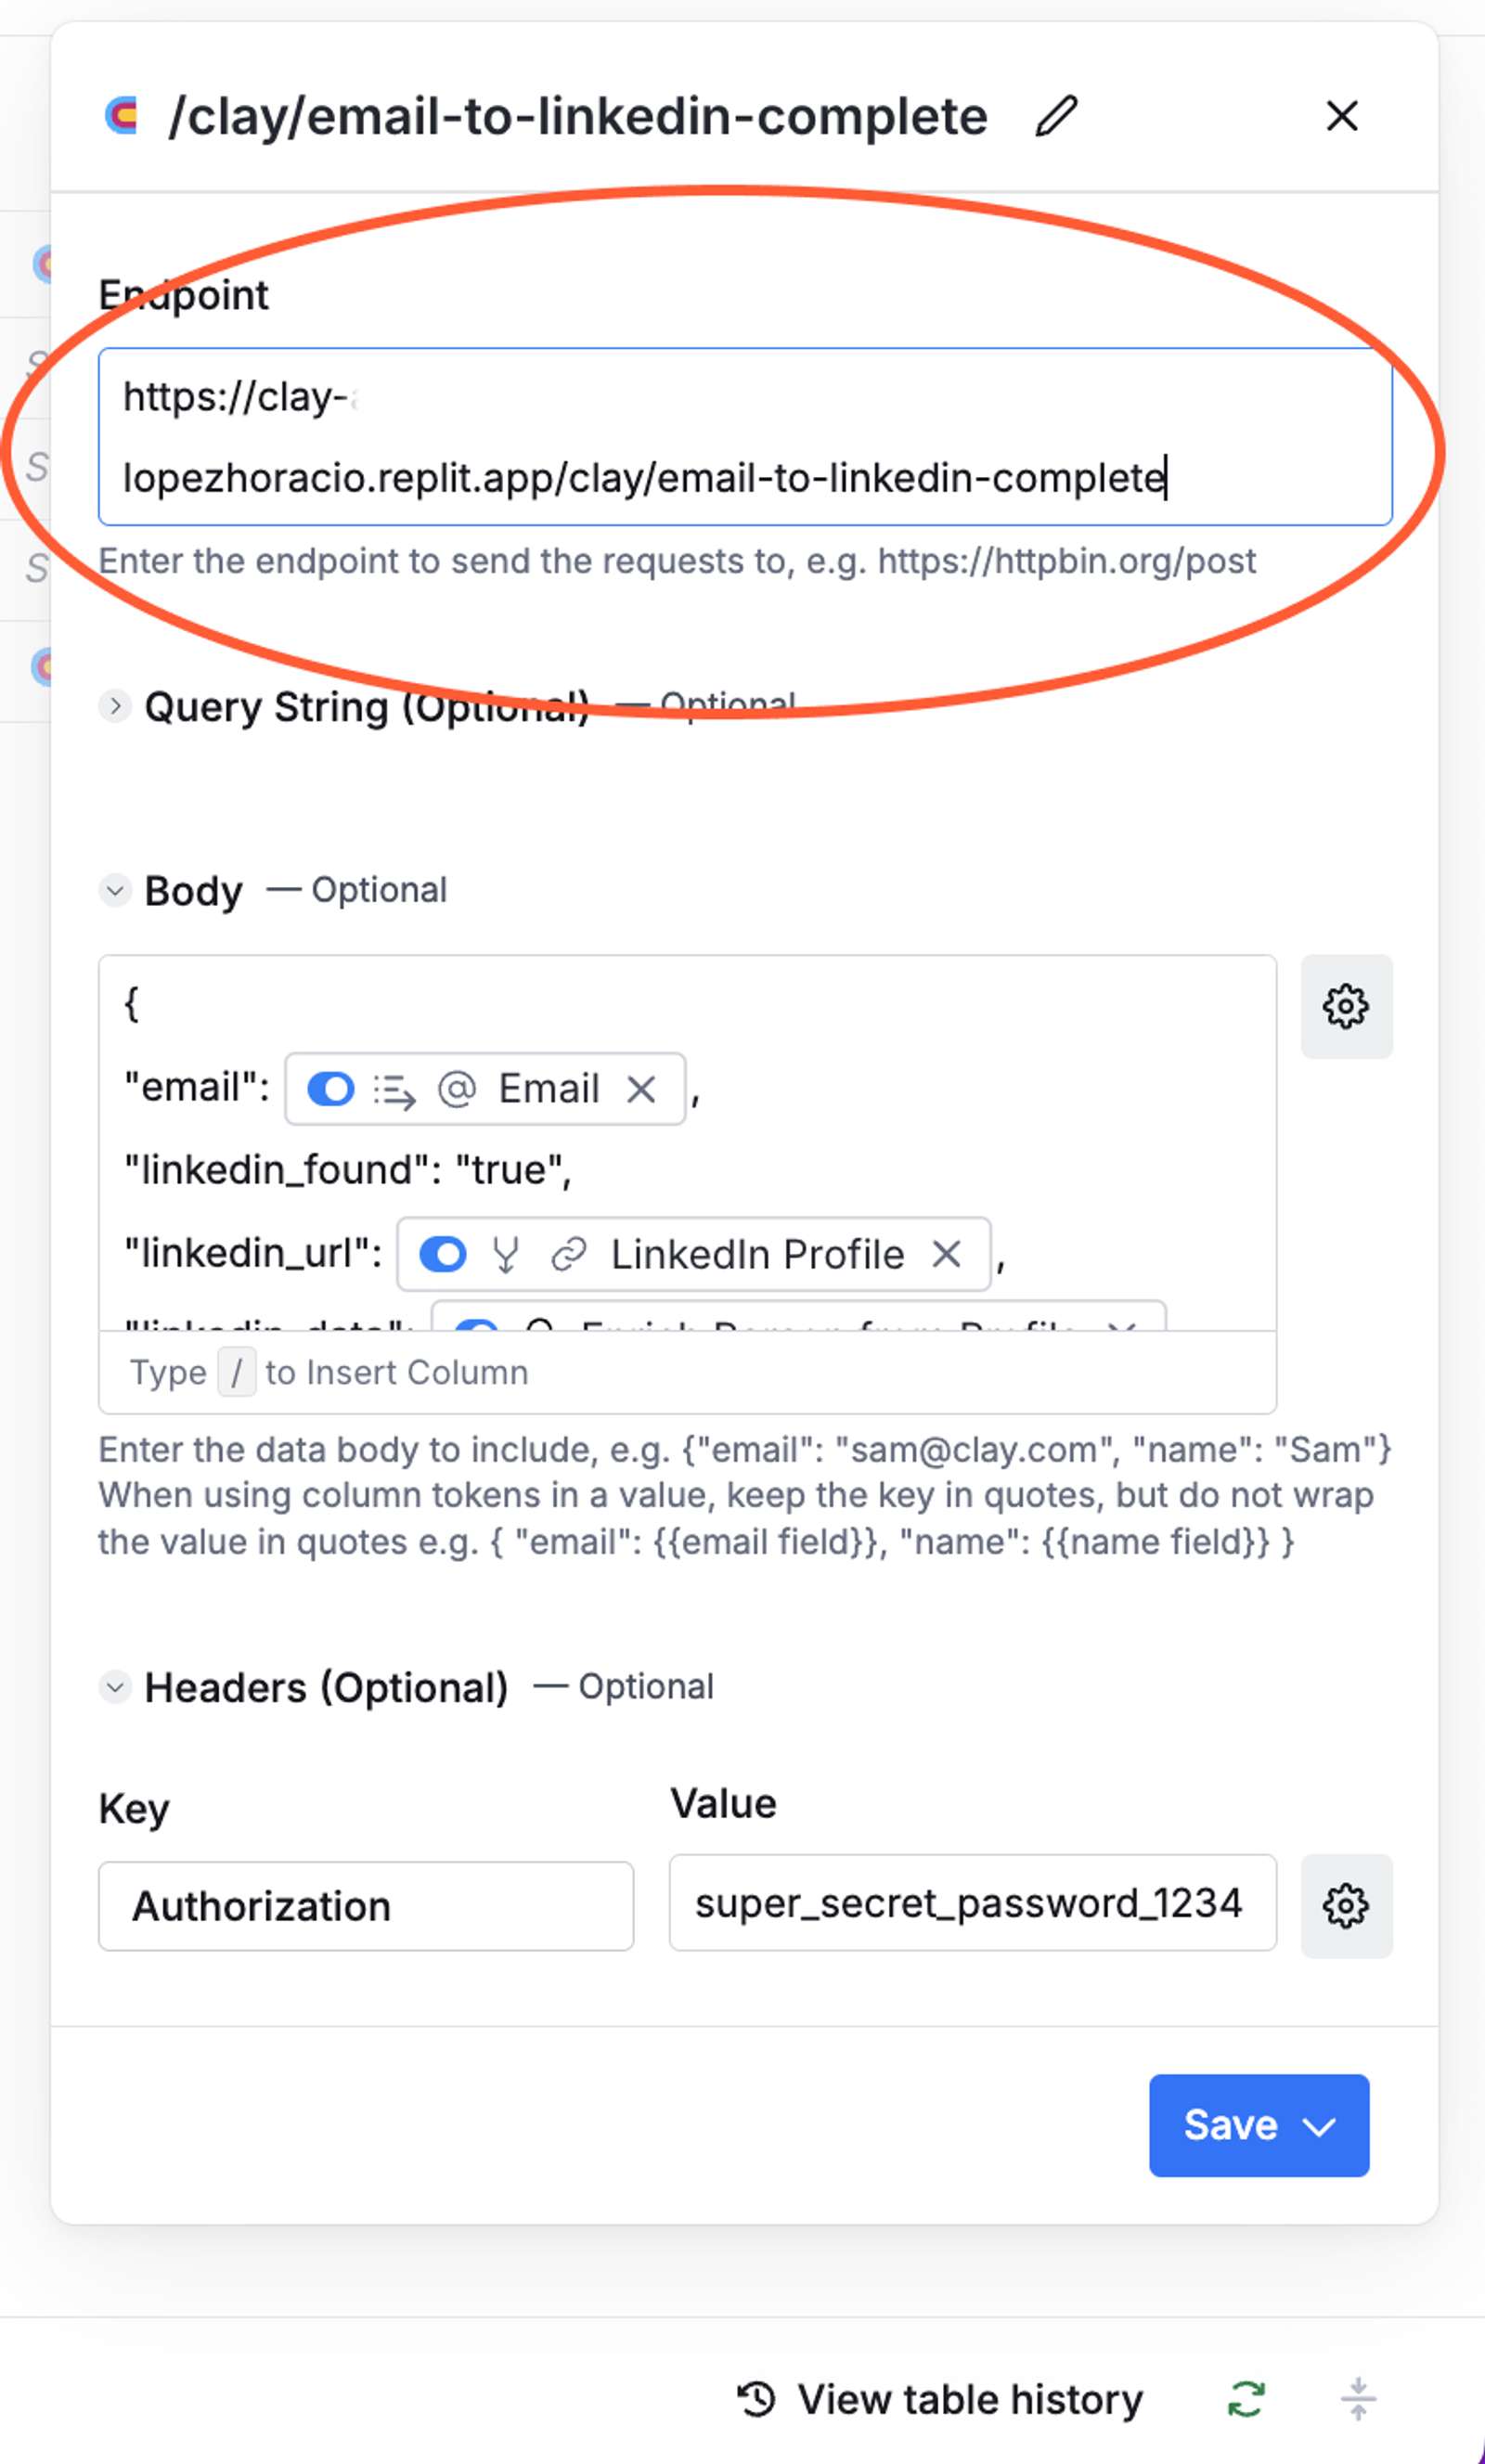
Click on the column /clay/email-to-linkedin-complete . In the Endpoint field, add in your development URL from your Replit Networking tab and within the Authorization field, fill in the value of your INTERNAL_API_KEY Secret.
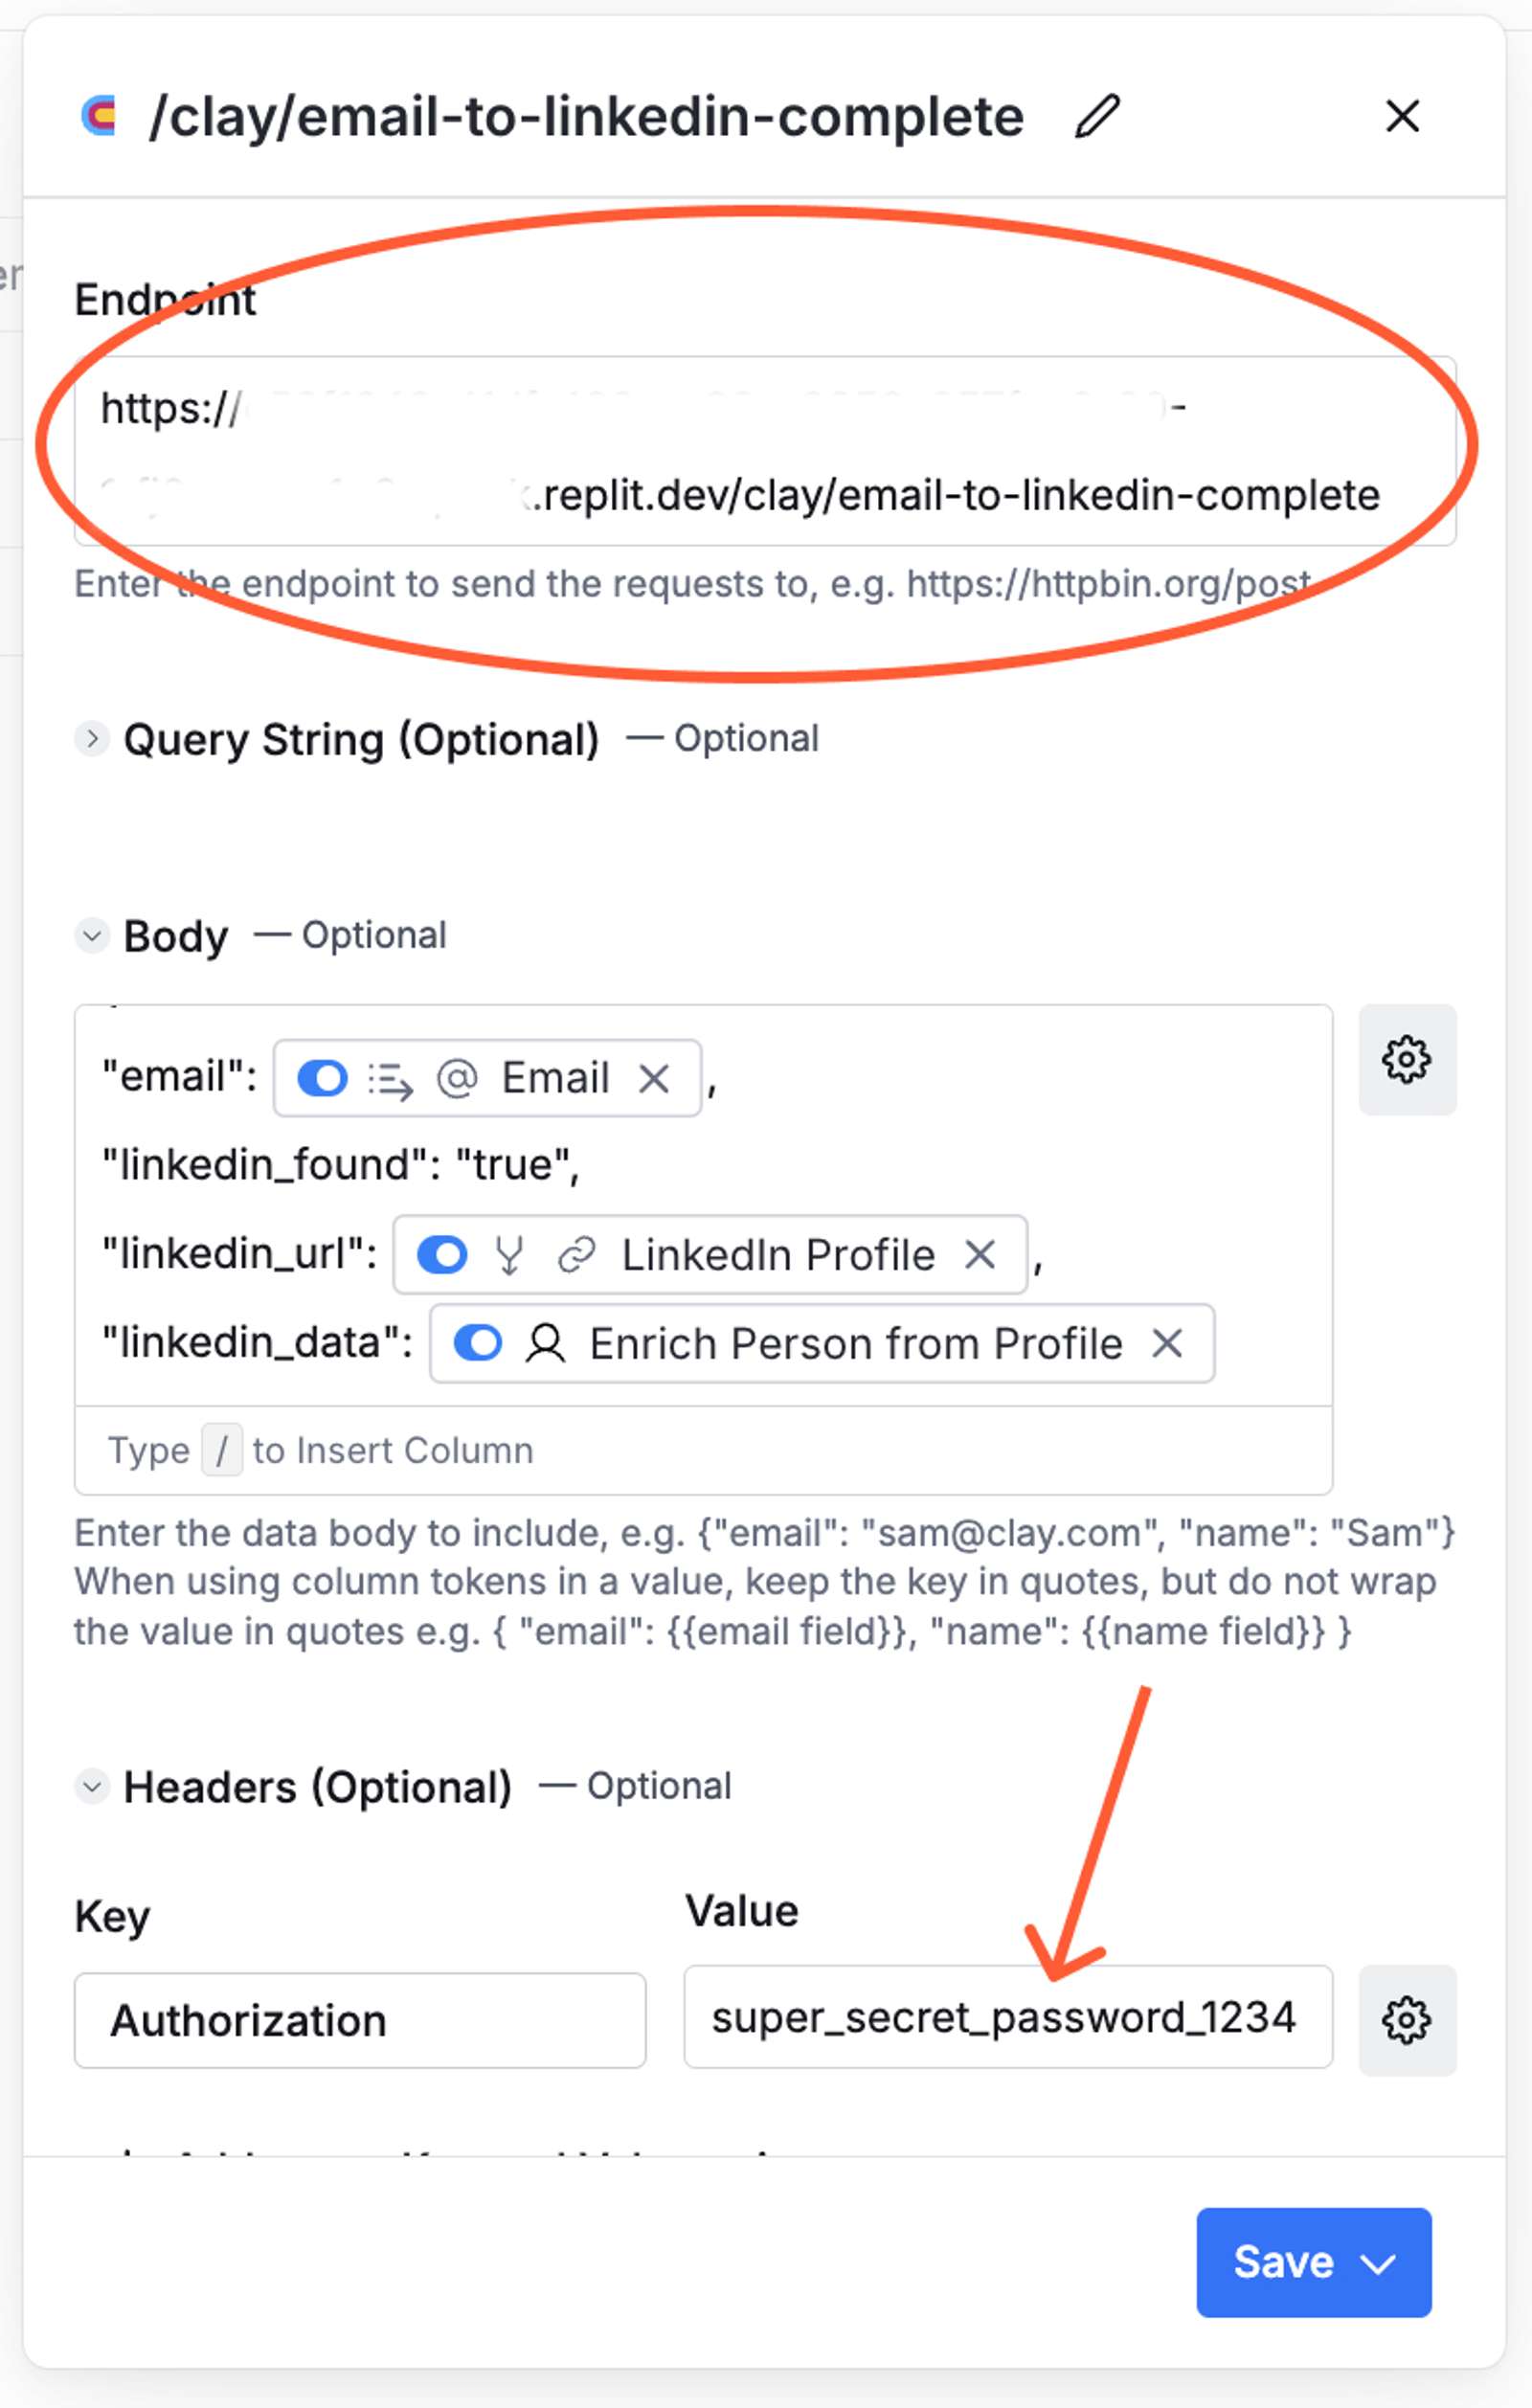
Repeat the process with the other HTTP column No LinkedIn Data - /clay/email-to-linkedin-complete. Add your development URL and internal API key in there too.
Running and Testing the API
Let’s do a test run!
- Click the "Run" button in your Repl
- Your API will start running in development mode and the development URL in your Replit Networking tab is live and able to receive requests while the Repl is running.
- Open the Replit Shell and send the following CURL command to your development endpoint using the Replit shell. Remember to replace YOUR_DEV_URL and YOUR_INTERNAL_API_KEY with your own values.
- Hit Enter in the Shell!
- Verify that your Clay table has received a response and the enrichment process has kicked off.
If all was set up well, you will receive a response with your LinkedIn data if the email was matched by the Clay data providers!
Deploying to Production #
Once you have done a few test runs in your development environment, it’s time to host your API so that it can stay up and receive requests 24/7.
In your Repl, open the Deploy tab. Choose "Autoscale" as your deployment type.
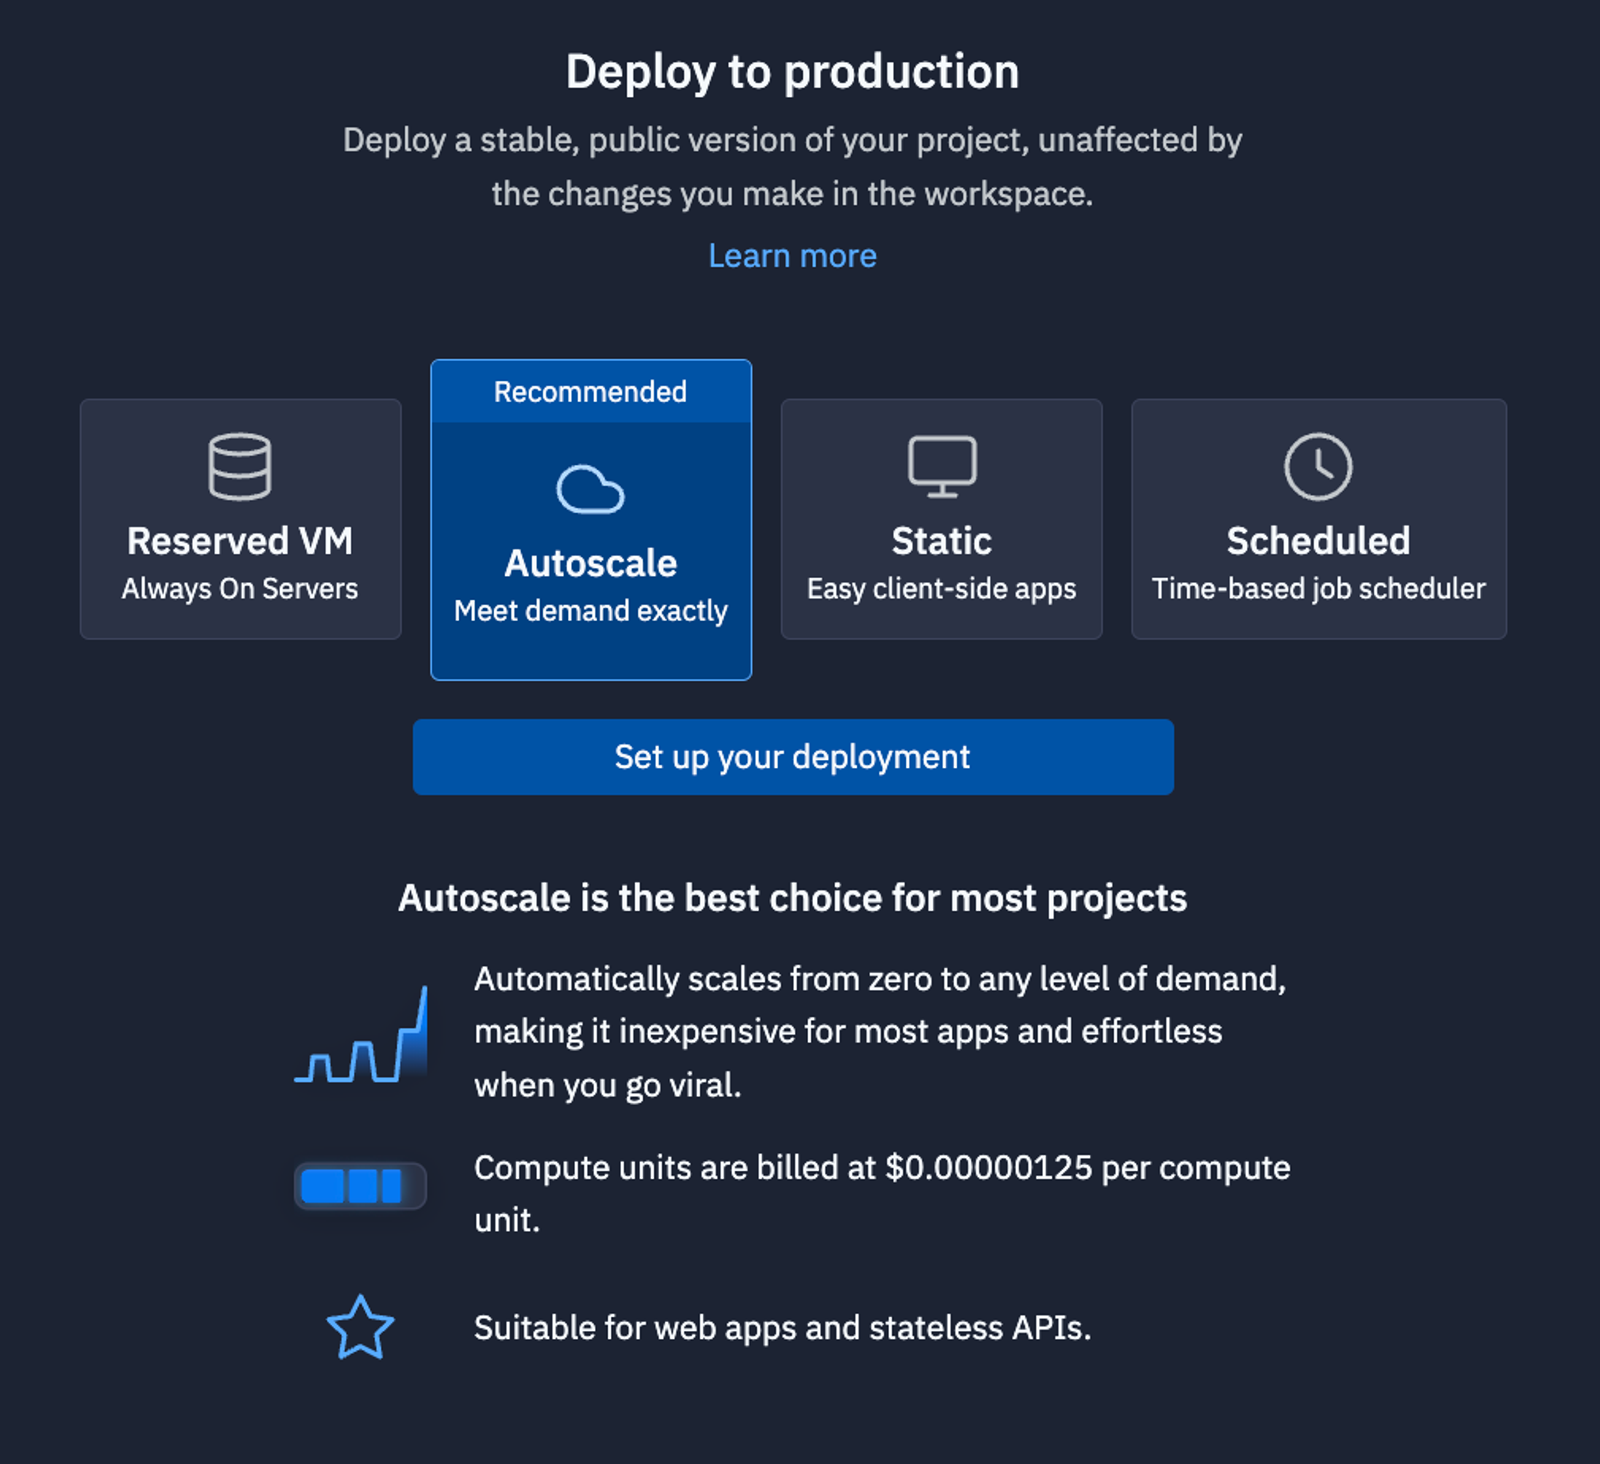
Keep the default deployment settings. They should be more than enough resources for now and you can always come back and edit the settings later.
Click the blue Deploy button to start your Autoscale deployment.
Let it run until it is complete and you get a new, production URL.
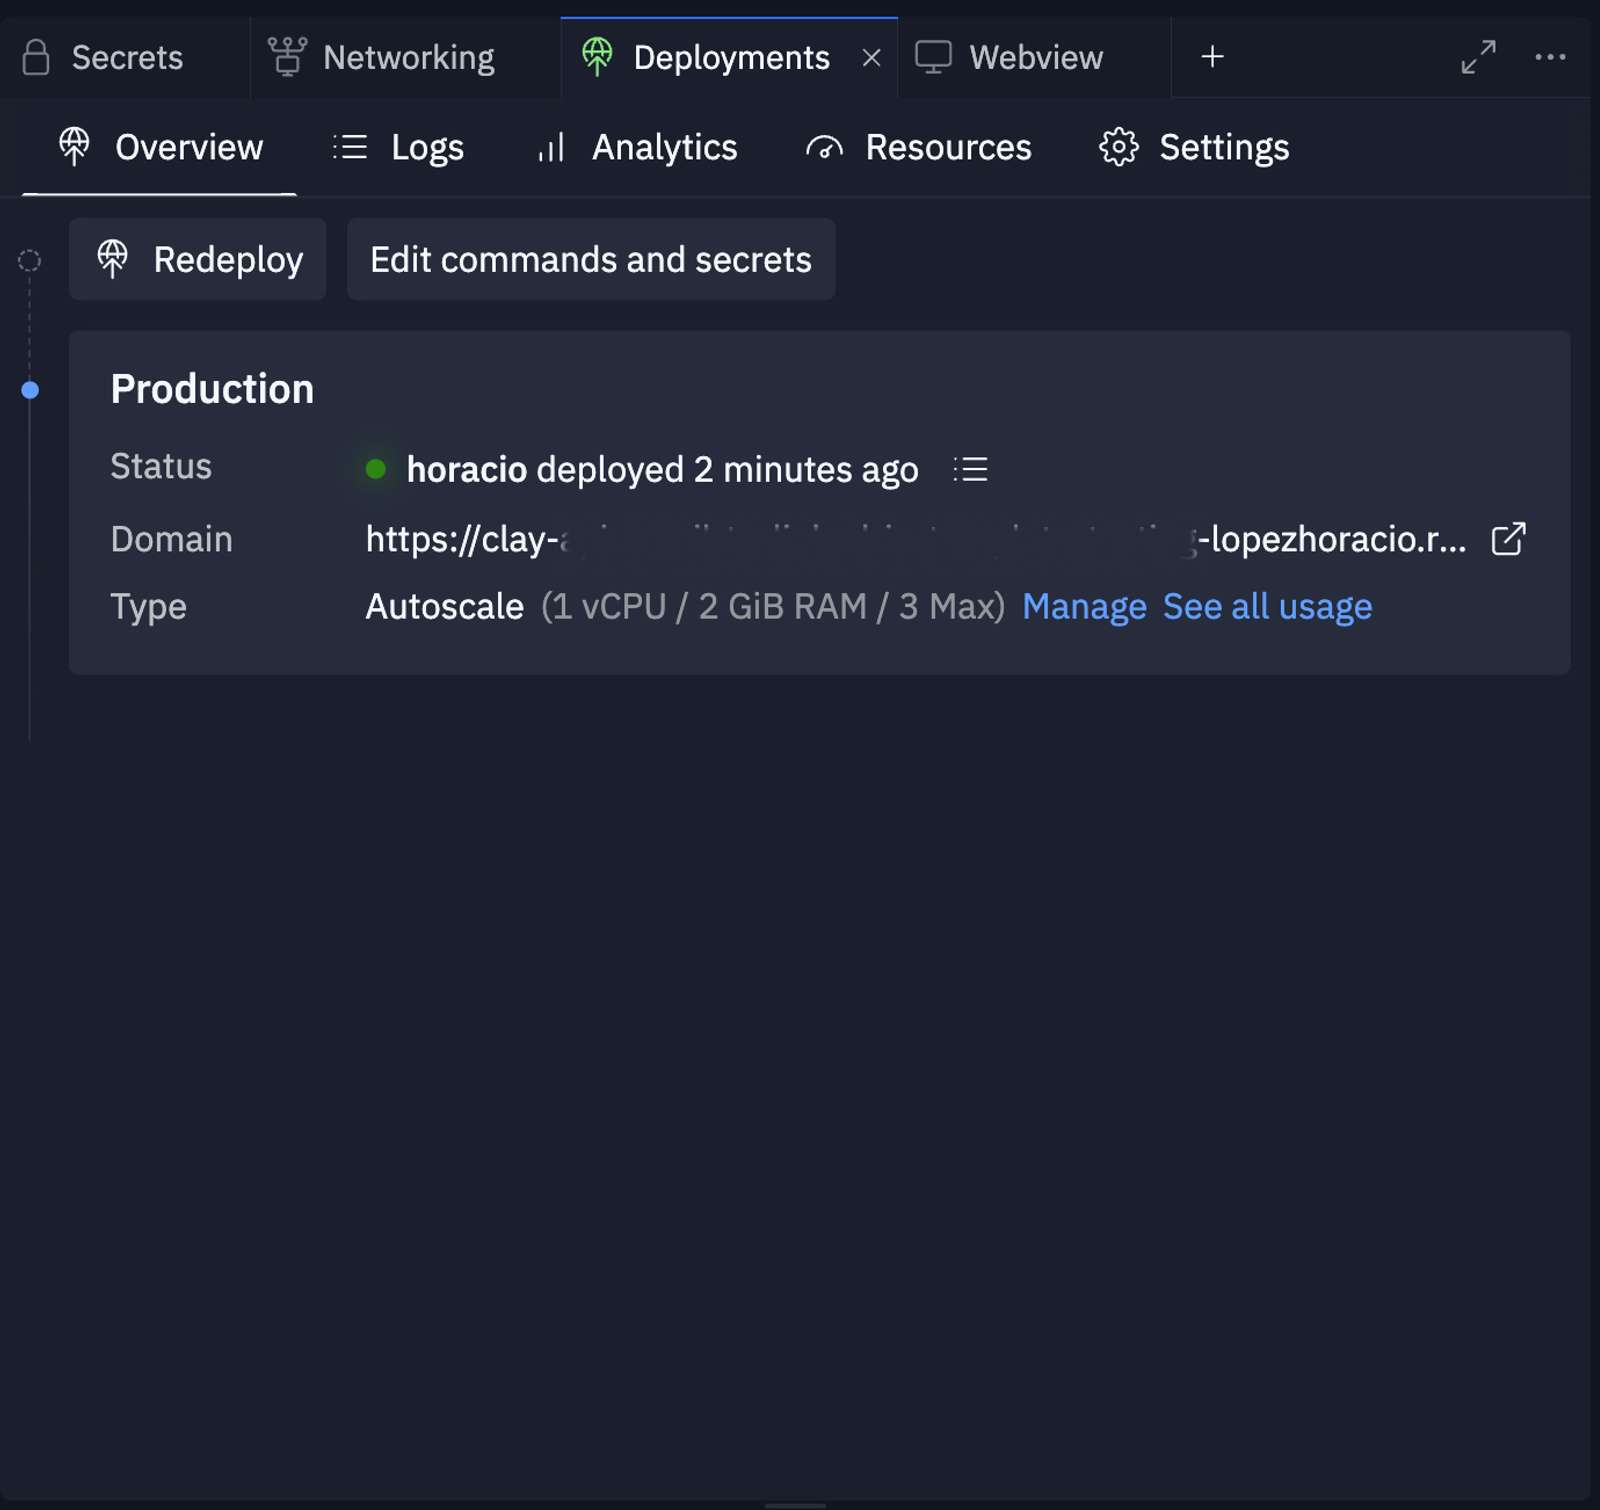
Your API is now deployed and ready to handle requests at scale. The Autoscale deployment will automatically manage instances based on incoming traffic once you swap it in for your development URL in the Clay table – see the steps below.
Swapping in your production URL
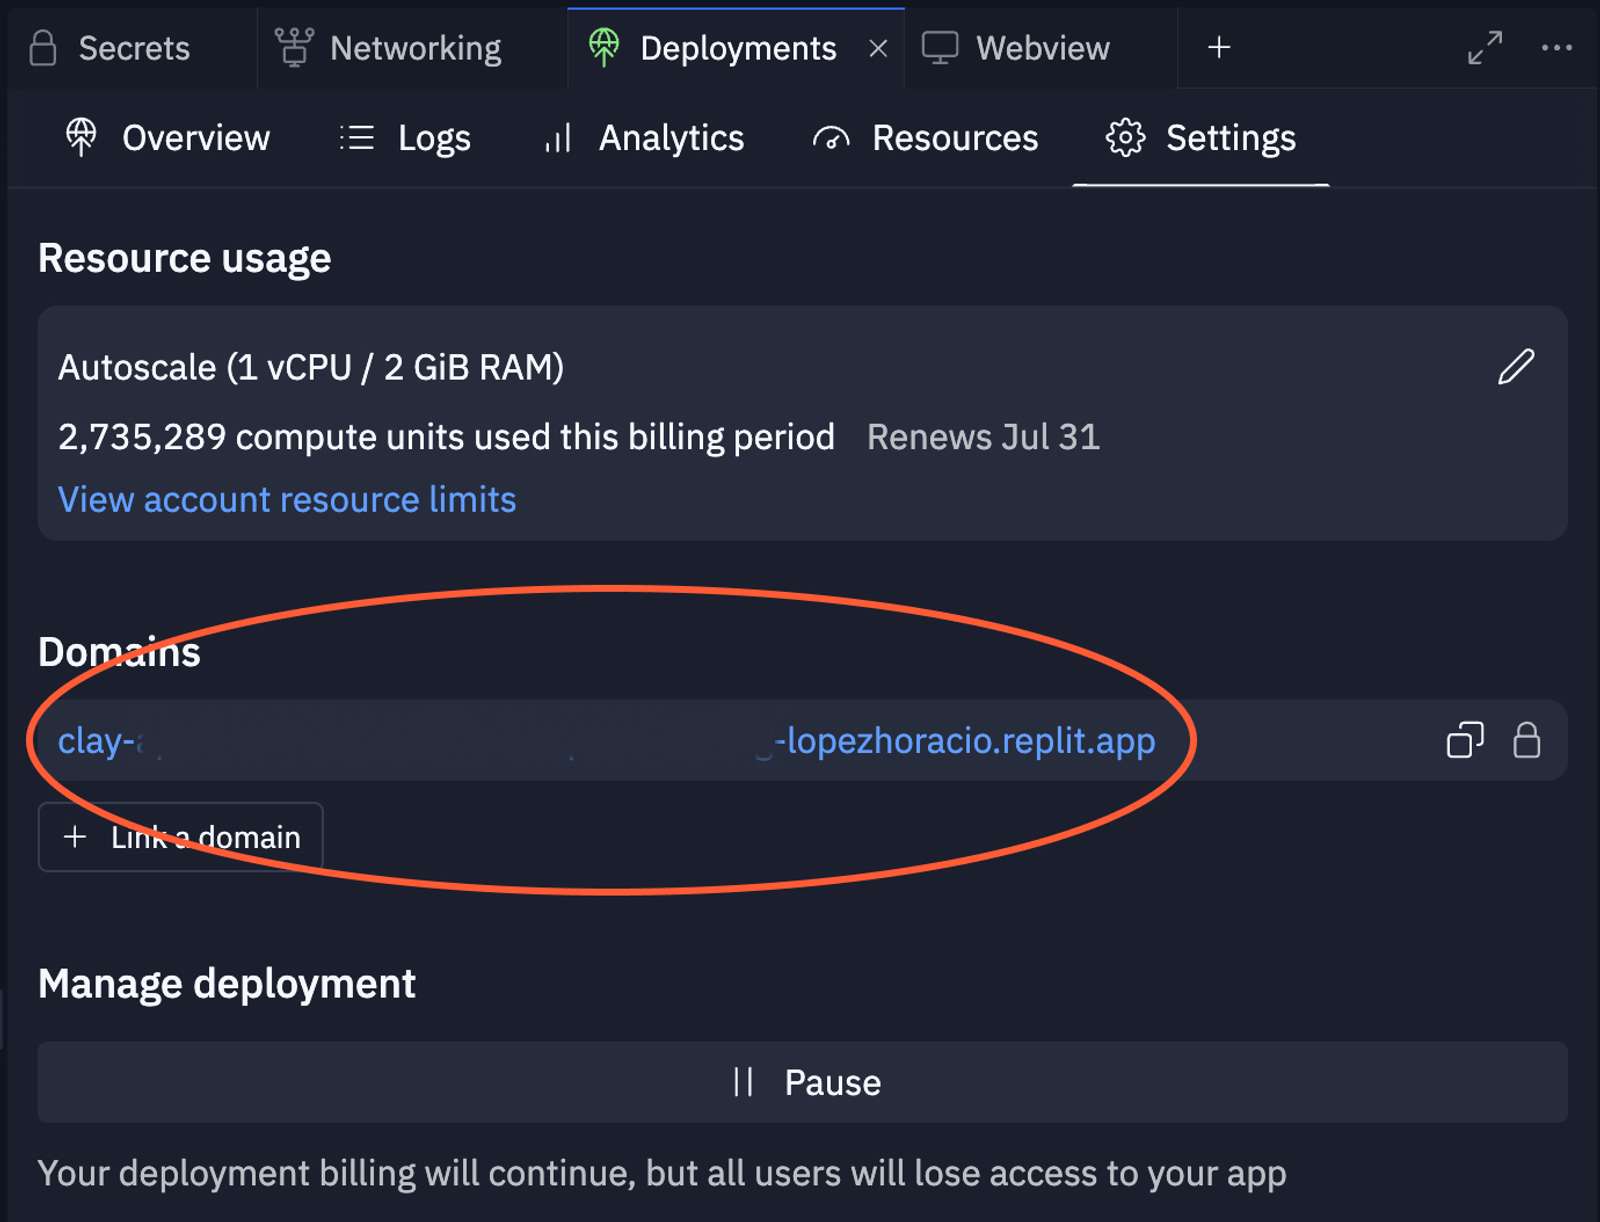
Once your API is deployed to production, you need to make sure that your Clay table will also start sending data to this hosted URL – this URL should in replit.app. And easy way to copy the URL is to go to Deployments > Settings there you should be able to copy the URL.
Head back to your Clay table and select your HTTP API columns. Swap out your development URL for your production URL in both HTTP API columns /clay/email-to-linkedin-complete and No LinkedIn Data - /clay/email-to-linkedin-complete.
Usage #
To use your deployed API:
- Send a POST request to the /clay/email-to-linkedin-start endpoint with the email address you want to enrich.
- The API will initiate the enrichment process and wait for the result.
- Once the enrichment is complete, you'll receive the LinkedIn profile data in the response.
Example request - Remember to replace YOUR_PROD_URL and YOUR_INTERNAL_API_KEY with your own values.
Conclusion #
You now have an API that enriches work email addresses with LinkedIn profile data. Now you can use this single endpoint to bring the power of Clay enrichment data to apps like:
- Enrich an email from a Slackbot alert
- Build an enrichment tool for an AI agent
- Or any workflow where enrichment data is required in a single API request.
If you’d like to bring this project and similar templates into your team, set some time here with the Replit team for a quick demo of Replit Teams.
Happy coding!
